- 833-265-6771
- Mon - Fri: 8:00 - 5:00 EST
(Updated August 25, 2023)
Color powder is a fun and family-friendly material that can be used for summer sports, arts and crafts, and even science experiments! In fact, many teachers love to use color powder to break down concepts regarding color, light, and physics for their students.
Hands-on scientific experimentation is highly important in education, especially when kids are young. The right experiment can instill a lifelong love of science, chemistry, and learning in your students. If you’re a science teacher looking for some fun and engaging science experiments to make the next class much more exciting, you’ve come to the right place.
Below, we’ll break down five color powder science experiments you can use to teach your students about the principles of color, the light spectrum, and more.
 Experiment 1: Colorful Chemistry
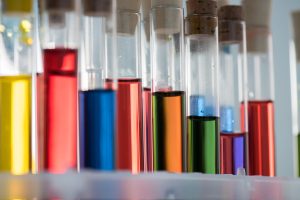
This first experiment is all about showing your kids how colors can change when exposed to chemical processes.
For this experiment, you’ll need:
Add some color powder to the universal indicator. Then have your students put 25 drops of universal indicator into one beaker, then add 200 mL of water. In the next beaker, place a full dropper of the vinegar, then add a full dropper of ammonia to a third beaker. Put 100 mL of vinegar in the fourth beaker, and pour the contents of the initial flask into the second beaker.
Almost done! Put the contents of the second beaker into the third beaker, then repeat the process with the third beaker going into the fourth beaker. Ta-da!
The universal indicator will change color when there are acids or bases with pH values of 2 to 10. In this way, you can show your students just how chemical processes can change the colors of existing solutions.
Don’t forget to tell your students just how this experiment is applicable to real life! The chemical effects that cause liquids and other substances to change color are important for cooking, art, medicine, and more. For instance, scientists might take one chemical and mix it with another to see what color the solution becomes. The colors they see can tell them important information about someone’s health.
This second experiment will teach your students all about the concept of chromatography, which is a scientific technique that can separate the different components of a substance to see what it’s made of.
To accomplish this experiment, you should collect:
Cut a small piece of the coffee filter into rectangular strips. Next, draw a pencil line over the narrow end of the strip 1 cm from the bottom.
Draw a small dot with a black marker right on the pencil line, then use tape or a binder clip to attach the pencil to the paper strip. Put the pencil over the top of the cup and make sure the paper strip hangs down without touching the bottom of the cup. Pour water into the beaker until it touches the bottom of the paper strip.
Over time, water will travel up the paper. When the water gets near the top of the paper, take the strip away and let it dry on a paper plate. Your students should see plenty of colors arranged in a chromatogram. You can modify this experiment with color powder by mixing the water in your students’ color of choice first to see how that changes the effect.
Chromatography is used every day, even though you might not be aware of it! Scientists use chromatography to create vaccinations, test food, test drugs, and test beverages. On top of that, forensic testing often uses chromatography. As an example, gas chromatography can be used to analyze cloth and blood samples, which can help the police identify criminals and bring them to justice.
The best way to understand light and how it works is to understand the color spectrum. The color spectrum is the full range of visible light that the human eye can detect, and it’s differentiated by different wavelengths of light. In this experiment, you’ll show your students exactly how the color spectrum works and how all the colors combine to form white light.
To make this experiment happen, get:
First, have your students add color powder together in a cup with water. See how the colors mix.
Next, have your students use a prism next to a light source, like a flashlight. They’ll see the colors split on the other end of the prism in a perfect rainbow. Your students can then shine the prism light on color powder to see how those colors mix.
Colors mix differently depending on whether they are light colors or paint colors. Light colors mix together additively, while color powder colors mix together in a subtractive way.
You can tell your students all about the everyday applications and uses for understanding the color spectrum. Artists use the light spectrum to create dazzling light shows and displays. Furthermore, electronic screens use the light spectrum to identify three colors – red, blue, and green – to create all the colors seen on a computer monitor or TV from just those three shades.
Cameras, medical imaging technology, and other devices make use of the light spectrum to ensure that they capture the real world in all of its colorful detail. Now your students will truly grasp how diverse light is and how they can create some colors from combining others together!
Every kid loves to make a mess, and this color powder experiment will let your students do just that. It’s all about making a colorful volcanic eruption by mixing vinegar and baking soda together! This experiment will teach your kids about chemical reactions, using color powder as a way to make the entire experiment more visually interesting.
For this experiment, collect:
Be sure to do this experiment outside! Have your students combine the base ingredients of water, baking soda, dish soap, and color powder in a cup until the cup is about two-thirds full. Have your students make a mound out of sand or gravel, then put the cup on top to turn it into a little mountain or volcano.
Stir everything together before adding the vinegar, then have your students step back and watch the foamy explosion!
One of the best real-life cases with which to explore this concept with your students is that of the combustion engine. A combustion engine in a car uses kinetics to create an explosive force powerful enough to drive wheels across the road.
However, kinetics is also seen at the microscopic level in plants all around your school. Photosynthesis is technically a type of kinetics as plants extract energy from the carbon dioxide in the air, mixing it with sunshine to produce food for themselves. At the same time, plants expel oxygen, which we use to breathe; the respiratory system

for humans can be consi
dered a type of kinetics at the molecular level.
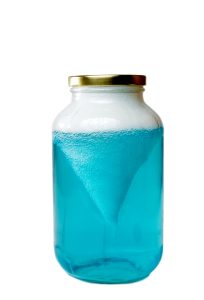
In this last science experiment, you’ll teach your students how to do a version of the classic tornado in a bottle experiment. Students will create colorful liquid tornadoes that swirl around in an upside-down bottle, teaching them about momentum and physical forces that drive everything from the motions of the planets to the flight of birds.
To get this experiment going, acquire:
First, fill one of the last bottles with water until it is three-quarters full. Add the color powder, then connect both the empty bottle and the water-filled bottle with a connector tube or tons of duct tape.
Have your students tip the water-filled bottle upside down while swirling it for 20 seconds. They should then stop swirling the bottles and observe the funnel cloud form in the top bottle. Water will funnel into the bottom bottle automatically. Your students can flip the bottles again and repeat the process to watch the color powder tornado swirl around inside.
Knowledge of physical forces is important for science, engineering, and transportation. For example, an airplane can only fly because the engineers understand how physical forces operate at high altitudes, using their knowledge to develop planes with wings shaped perfectly so they can catch air beneath them and lift the rest of the aircraft sky-high.
As you can see, these color powder experiments can make science class fun for kids of all ages. They’re hands-on, safe, easy to set up, and don’t require a ton of class time to complete. Best of all, they’re stellar for teaching a novel lesson about physics or light.
Want to set up these specific experiments in your classroom? First, you’ll need plenty of color powder. Fortunately, you can get color powder in bulk from Color Powder Supply Co. Check out our selection today!